Thursday, January 19, 2012

The Knitting & Crochet Group

Every Saturday morning at Beverly's in Santa Maria crafty ladies trickle into the store to participate in the FREE Knitting and Crochet Group.  We call them a group but really the word "group" doesn't do them justice.  These ladies are friends and in some cases family that come together to share ideas, friendship and fun. They welcome new members with big smiles and warm hearts and every person there is made to feel that they belong.  They are a diverse collection of talented ladies of all ages that have found a common ground: yarn and creativity.  We look forward to seeing them on Saturdays (and Wednesdays, too!).  Their positive energy and spiritedness adds a little something special to Saturdays at Beverly's in Santa Maria.  So, as a thank you to these amazing ladies I thought we might feature them on our blog.  I figured they might like the attention...hee hee!

The ladies gather around tables near fabrics.  If anyone if having trouble with a stitch there is always someone ready and willing to help out.

Some of the ladies use looms while others use hooks. Children are encouraged to learn to create with yarn as well.

There is a lot of sharing in this group.  Everyone comes prepared to work on a project that they've already been working on.  BUT they also come prepared to learn something new.

These ladies are amazing! I don't knit or crochet but watching them on Saturdays makes me want to!  They are talented and creative but more than that they are delightful!  They are our customers but they are also our friends!

Thank you to the Knitting and Crochet Group for making
Beverly's in Santa Maria
the place to be on Saturdays!
Now Go! Be Crafty!

Thursday, January 12, 2012

Get Some Duct Tape!


Seriously, you are gonna wanna get some duct tape! We aren't talking about the silver duct tape that you have hanging out in the utility drawer.  We're talking about the colorful, fun-printed duct tape that you can get at Beverly's in Santa Maria on Aisle 8! AND it's on sale all month long for $3.88 a roll!  So, what does one do with duct tape?  Well, the possibilites are ENDLESS and a pre-teen insider told me that duct tape is WAY popular among the junior high crowd!  So, I'm telling you, if you want to earn coolness points with that special 'tween in your life, get yourself some cool duct tape, make a date with said 'tween and prepare for an evening of craftiness and bonding! 
Just a sampling of all of the cool printed duct tape we have on Aisle 8 at Beverly's in Santa Maria!  We also have a variety of solid colors!
So, apparently this is what the junior highers are doing with their duct tape.  It's the "in" thing to do with strips of duct tape.  I personally don't get it----but don't tell my 'tween that I said that!
 
I made the wallet and my 10 year old made the bow.  The entire thing is made of duct tape...except for the $5 bill).
 I found a bunch of different things that can be made out of duct tape.  I made a checkbook without a pattern, using another checkbook as a reference.  (This seriously impressed the 'tweens.  Coolness points scored!)  The only parts that aren't duct tape are the clear plastic used as a window for an ID and the magnets to help hold the checkbook together when it's folded.
                                   
                        
We only made a few different things but you could also make belts, book covers, bookmarks, headbands...the possibilities are endless.
The minute I handed her the duct tape my daughter got to work on ribbons for her hair.  She designed the bow by herself and then attached it to a bobbie pin.  Hair bows are another popular trend at the moment!

Once the girls got started making stuff out of duct tape they were unstoppable!


So, I'm telling you...get some duct tape and prepare for a few hours of creative bonding!  But you don't have to be young or have a youngster in your life to thoroughly enjoy playing with duct tape.  I'm not a 'tween and I have to say I'm addicted!

Now Go! Be Crafty!


Tuesday, January 3, 2012

Is that a salsa jar?!

Salsa jars are kind of cute.  I decided this while rinsing one out to put it in the recycle bin.  OK, so when they have a plastic label still on them: not so cute. BUT the cuteness potential  is there!  Here!  We'll prove it!
You will need...
                         *A Glass Jar
NOTE: DO NOT use a plastic container if you are
           planning on using it into a candle holder or  
           anything else that could cause the plastic to melt.
                         *Tissue Paper
                         *A foam brush
                         *Mod Podge
                         *Ribbon or string
                         *Beads
We used an empty (scrubbed clean &dried) GLASS salsa jar BUT if you want to start with a brand new jar we have them on aisle 13 at Beverly's in Santa Maria! We then removed the sticker which ended up leaving some sticky residue that actually ended up helping keep the paper stuck to the jar.

We cut a strip of tissue paper wide enough to cover the jar from top to bottom & long enough to go around the entire jar. We have tissue paper in the party supply department of the store.

We used Mod Podge (Aisle 8) and foam brushes (also, Aisle 8) to secure the tissue paper to the jar.

Once the entire jar was covered with thin, even layers of Mod Podge, we let it dry in the sun for a bit.  It dries pretty quickly when allowed to dry in fresh air and sunshine.

We added some ribbon/string (ribbon can be found on Aisle 16) around the top of the jar and made a bow.   We tied a couple of pony beads (in the kids section at Beverly's in Santa Maria) to the ends of the ribbon/string.

The completed jar! Cute, right? I think I'm going to use this one as a candle holder BUT I could also use it as a pencil holder or a place to keep small treasures.  The possibilities are endless!


Now Go! Be Crafty!

Monday, January 2, 2012

Welcome Signs Rock!

We have this rock that came with our house when we bought it.  We didn't get rid of it or anything. We just let in continue to hang out in our front yard.  Sometimes it attracts a snail or two but mainly it just sits there, soaking in the sun or rinsing in the rain.  The neat thing about this rock is that it's kind of big and flat.  Everytime I passed it I thought, "I really need to do something cool with that rock." And, finally I did!  Since it insisted on hanging out at our house I figured it might as well be useful! 
This project is super simple and everything you need (except the big, flat rock) can be found on Aisle 6 (paint & foam brushes) and Aisel 8 (Mod Podge) at Beverly's in Santa Maria!
Here is our rock hanging out, just begging for a make-over!

All of the necessities: paint, foam brushes & Mod Podge!

I painted the rock black, waited for the paint to dry then painted the letters and the flowers free-handed. If you aren't comfortable painting letters you could use stencils or stickers (we have lots of cool ones at Beverly's in Santa Maria)!  Once all of the paint was dry, I put on a few coats of Mod Podge.  Mod Podge goes on white but dries clear.  Just make sure that the coats are thin and without clumps.  If you put it on too thick it will dry white.

Thank you for checking out our latest blog post!
Now Go! Be Crafty!

Friday, December 30, 2011

Super Easy Quotation Frames

Every new year I seem to become acutely aware of all of the projects that I’ve been meaning to finish but haven’t.  I find myself cleaning up that closet that I rarely open, that junk drawer that’s become a catch-all, that corner that insists on collecting clutter…you get the idea.  So, this year as I began my little tradition I quickly came across a set of frames hidden in a closet, full of dust and just begging for something crafty to happen to them!  I decided to combine 2 of my favorite things: paper crafting and quotations!  The project was SUPER simple to make; I didn’t even use stickers! (I KNOW! Craziness! BUT, I wanted the quotes to stand alone without the distraction of too many embellishments.) I just used some scrapbooking paper that I already had…if you don’t have paper on hand, I HIGHLY recommend you run over to Beverly’s in Santa Maria and get some! J  

The 3 frames: just hanging out, collecting dust.
Anytime I need a cool quote, I go to The Quote Garden!(http://www.quotegarden.com/)  I can always count on finding the perfect quotation from a selection of people WAY wiser than I am!  AND you can search for the perfect inspirational quote by topic! 

I picked a quote that I liked, highlighted it and copied.

I then opened up a new word document and pasted the quote.
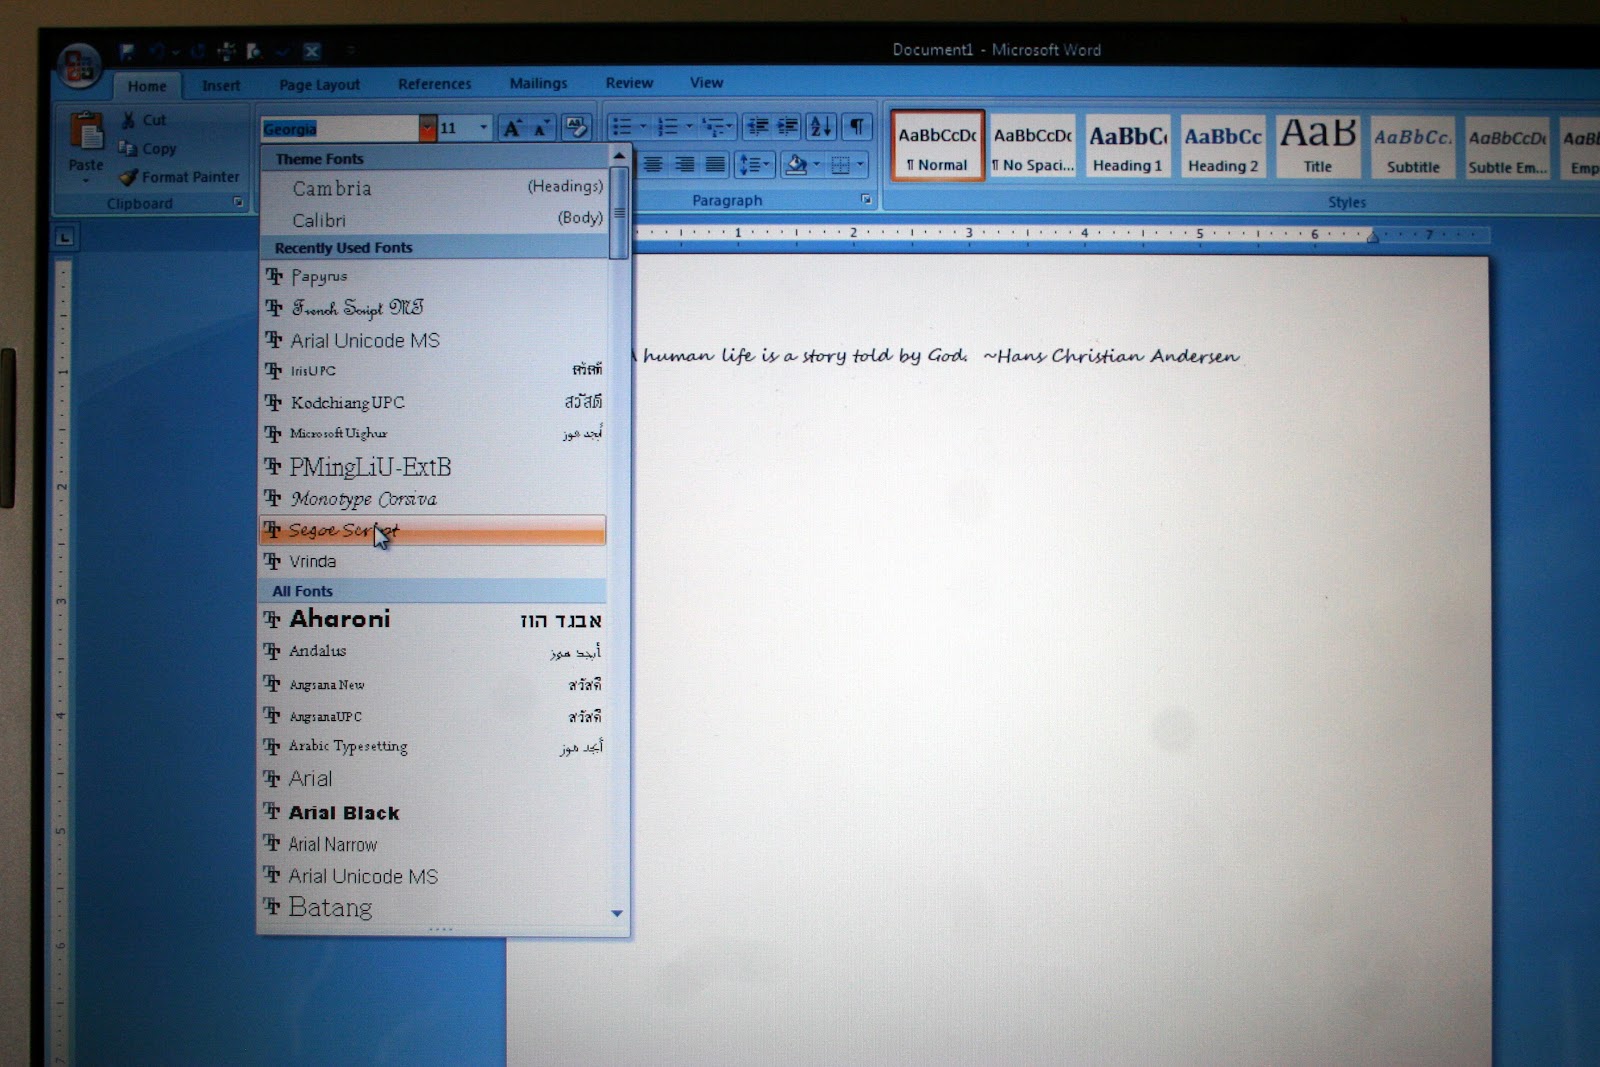
Picking a font is always fun!


I ended up choosing 3 quotes that I really liked.  I picked out fonts that I thought suited the words best and then printed them onto cardstock.  I then chose different papers to layer them with.

The finished product: 3 quotes that will remind me and my family of what is most important throughout 2012.

This project was super easy, inexpensive and (of course) fun to do.  I think I’m going to paint the frames though. (They’re too dark, for my taste--maybe that’s why they were in the closet in the first place!)  If you don’t have frames hidden in a closet you could always get them at Beverly’s in Santa Maria!
Now Go! Be Crafty!

Monday, December 26, 2011

Beverly's Santa Maria's Crafty People


One of the coolest things about working at Beverly's in Santa Maria is that you get to be crafty a good part of the time you're at work!  Right now, the crew has set their focus on beautifying the end caps!  End caps are the first thing you see when you walk down any given aisle of the store and at the moment you can find cool projects popping up on the end caps throughout the store!  We thought we might just have to feature some of the very inspirational craftiness in our blog.  So, here it is:


Glass bowls,
scrapbooking sparkles,
candles,
beads,
ribbons...cute
& Spring-y!
Not to mention,
Inspiring! 


All of the goodies you need to make this basket
with the little bird and the ivy are all on the end cap!


 Easter Aprons= Super Cute! 


 It might be too early for some of you to start thinking Springtime BUT Valentine's Day is just around the corner!  Now would be the perfect time to start planning out those Valentine crafts!


I think that the stenciled box is my favorite end cap so far (but I kinda have a thing for boxes)!  They used sparkles (who doesn't LOVE sparkles) and butterfly stencils.  The rest of the end cap has many more stencils to choose from and boxes in different sizes!

So,  there you have some craft inspiration from the folks at Beverly's in Santa Maria.  These crafts are all easy enough for pre-teens to do on their own and since winter break doesn't end until mid-January it might be a good time to stock up on some cool craft projects! 

NOW GO! BE CRAFTY! 

Friday, December 23, 2011

Janelle's Apple Cider

We had a great time at the Open House a few weeks ago!  Not only did we have some pretty awesome deals going on but we also had yummy goodies for our customers to enjoy.  (They needed something to keep their energy up while they shopped!) Because it was a special occasion and because we were getting all geared up for Christmastime Janelle made her most delicious apple cider. Just about every person (and I am NOT exaggerating!) that came up to the cash register to pay asked where the cider came from.  It was a HUGE HIT!
I don't know how you all feel about apple cider but I could really take it or leave it...until I tried some of Janelle's Apple Cider.  YUM!  I've been craving a cup ever since but haven't gotten around to making some. I've actually been thinking that I might have to impress the in-laws with some scrumptious apple cider for Christmas!  So, just in case you have someone that YOU want to impress on Christmas we decided to include Janelle's recipe in our blog.  We hope that you enjoy it as much as we all did!


Janelle’s Apple Cider

Ingredients:
1 Gallon Apple Juice
2 tbsps. whole cloves
5-6 cinnamon sticks
A few dashes of nutmeg
5-6 unpeeled orange slices
1 cup brown sugar

Stir all ingredients in a large pot and bring to a simmer.  Janelle says, “The longer it simmers, the yummier it gets!” 
Serve with a cinnamon stick.  Please use caution when serving, the cider will be HOT. Be sure to allow it to cool a bit before serving to children.

Thank you for checking out our
Apple Cider blog post! 
We hope that you have the happiest of holidays filled with love, peace and craftiness!

Now Go!  Be Crafty!